
Set Up Text Messages (SMS)
Send clients and staff automatic SMS notifications and scheduled reminders. See Overview of Notifications for notification types.
Important: SMS messages are billed separately. Pricing varies depending on the destination country.
Step 1: Open SMS Notifications
Section titled “Step 1: Open SMS Notifications”- Log in to your Bookly Cloud account.
- Click the SMS Notifications product card.
- Click Get Started.
Top up your Bookly Cloud balance before sending SMS messages.
Step 2: Add an administrator phone number
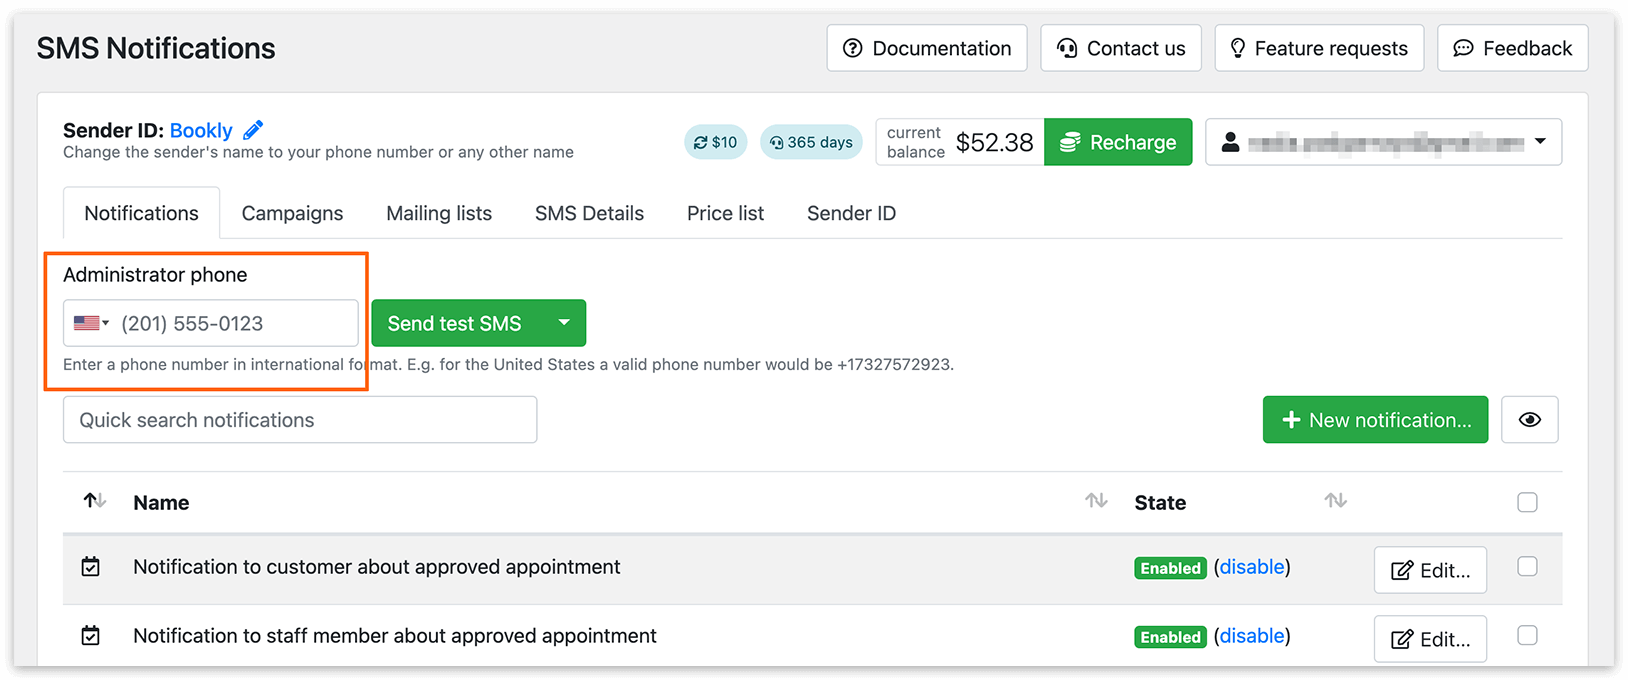
Section titled “Step 2: Add an administrator phone number”In SMS Notifications, enter your administrator’s phone number in international format in the Administrator phone field.
Step 3: Set up CRON for scheduled messages
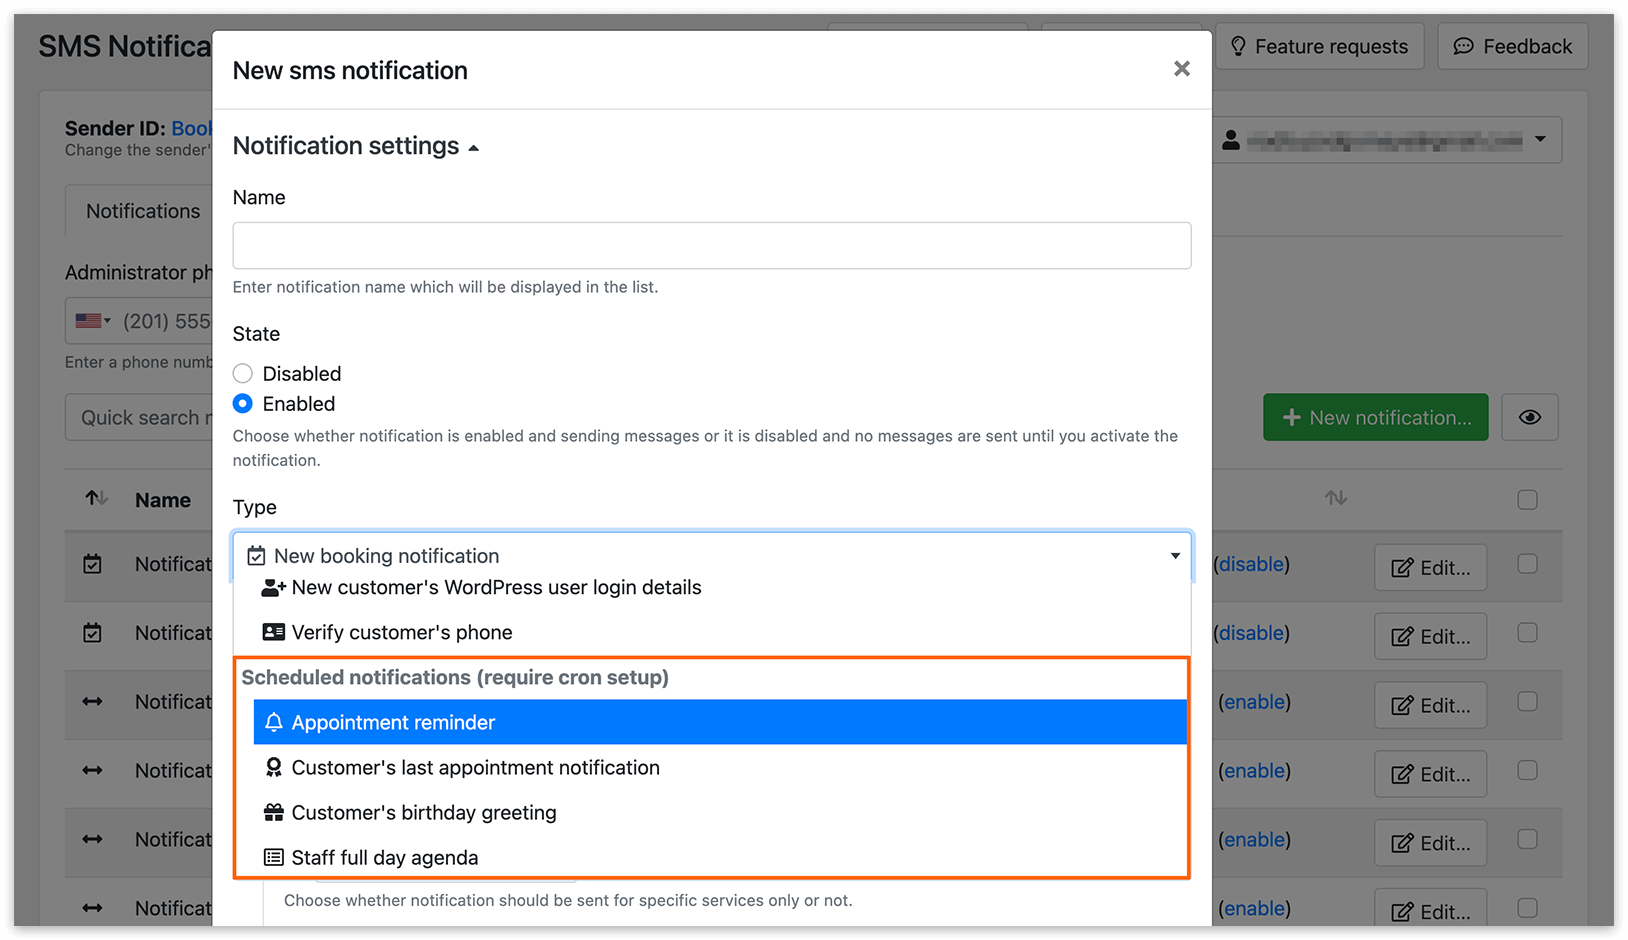
Section titled “Step 3: Set up CRON for scheduled messages”For scheduled notifications, configure cron:
- Use Bookly Cloud Cron, or
- Run the following command hourly:
wget -q -O - http://[your-domain]/wp-cron.phpIf needed, contact your hosting provider for assistance.
Step 4: Configure notification messages
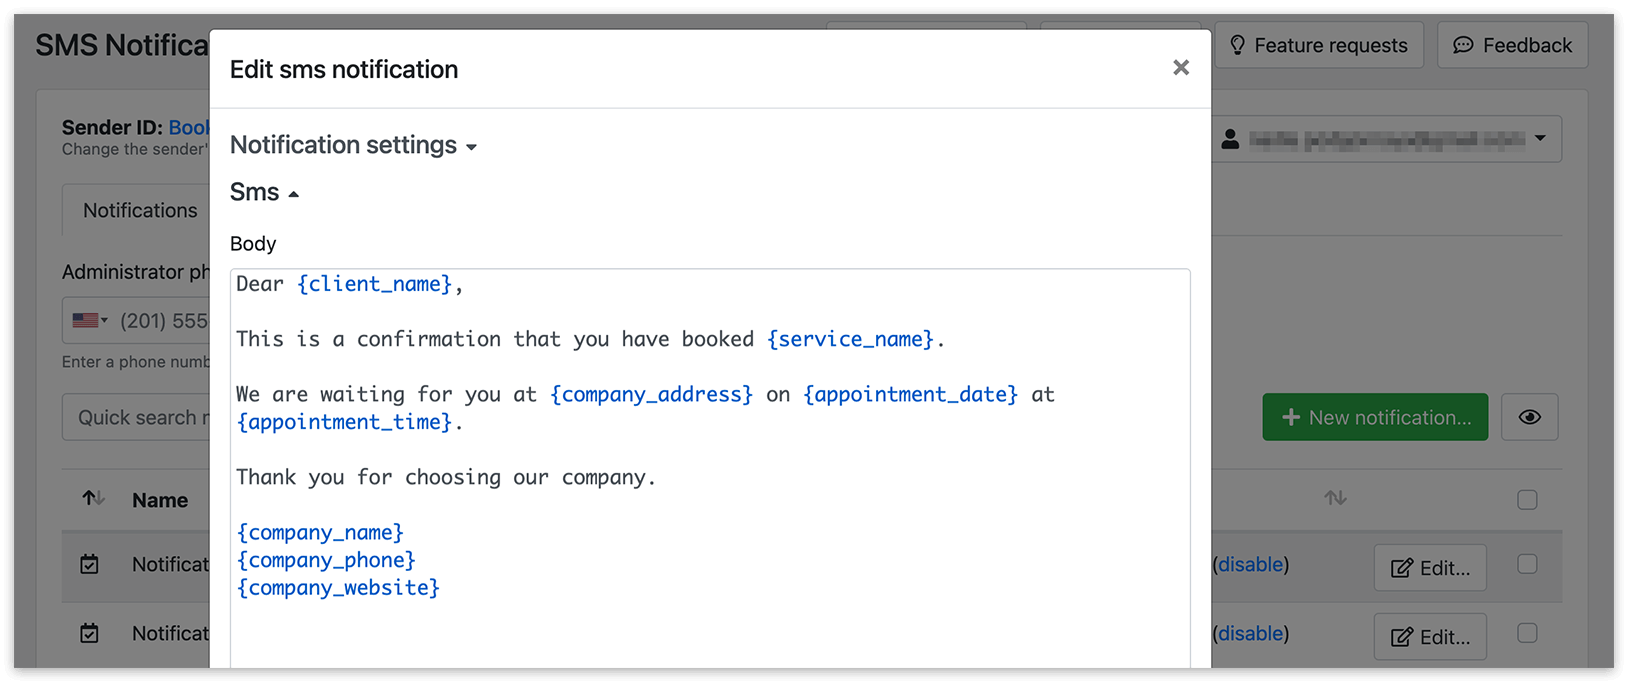
Section titled “Step 4: Configure notification messages”- Choose a notification type and use an existing template or create your own.
- Write your message.
- Personalize your message with placeholders in {curly brackets}.
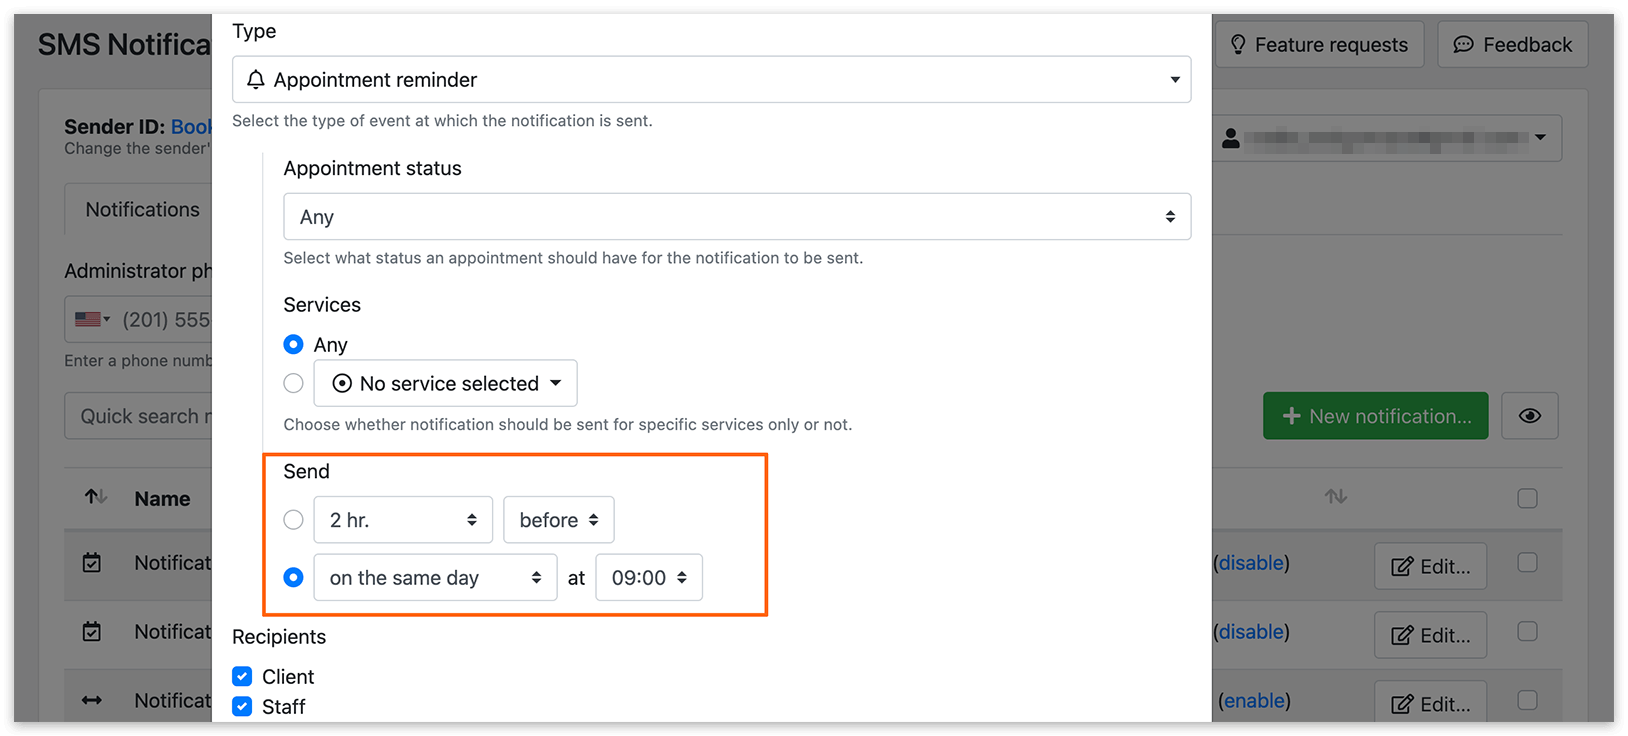
- Set the sending time for scheduled notifications.
Custom Sender ID
Section titled “Custom Sender ID”Use a custom Sender ID to display your business name instead of a phone number.
Messages with a custom Sender ID typically cost 20–25% more. See Text Message Rates for details.
Note
- Sender IDs must be 4–11 characters long.
- Availability depends on local regulations. Where custom Sender IDs are unsupported, messages use a generic SMS gateway number.
SMS length
Section titled “SMS length”Messages that exceed the following limits are split and charged as multiple SMS:
- Latin characters: up to 160 per message
- Other characters (e.g., Cyrillic, Chinese, Arabic): up to 70 per message
You can use an online SMS length calculator to check your message.
SMS Campaigns (Marketing Messages)
Section titled “SMS Campaigns (Marketing Messages)”Send bulk SMS messages to your customers with mailing lists and manual or scheduled campaigns. See Create an SMS Campaign for instructions.
SMS Verification (Customer Phone Validation)
Section titled “SMS Verification (Customer Phone Validation)”Ensure customer phone numbers are valid during booking.
For Step-by-step booking form
Section titled “For Step-by-step booking form”Go to Settings > Customers > Verify customer’s contact information.
Options:
- Off – Disable verification
- Always verify phone – SMS code sent every booking
- Only if data is different from the previous order – SMS sent only if phone number is new

For Modern booking forms
Section titled “For Modern booking forms”- Open your booking form.
- Go to the Details tab.
- Enable Verify phone.
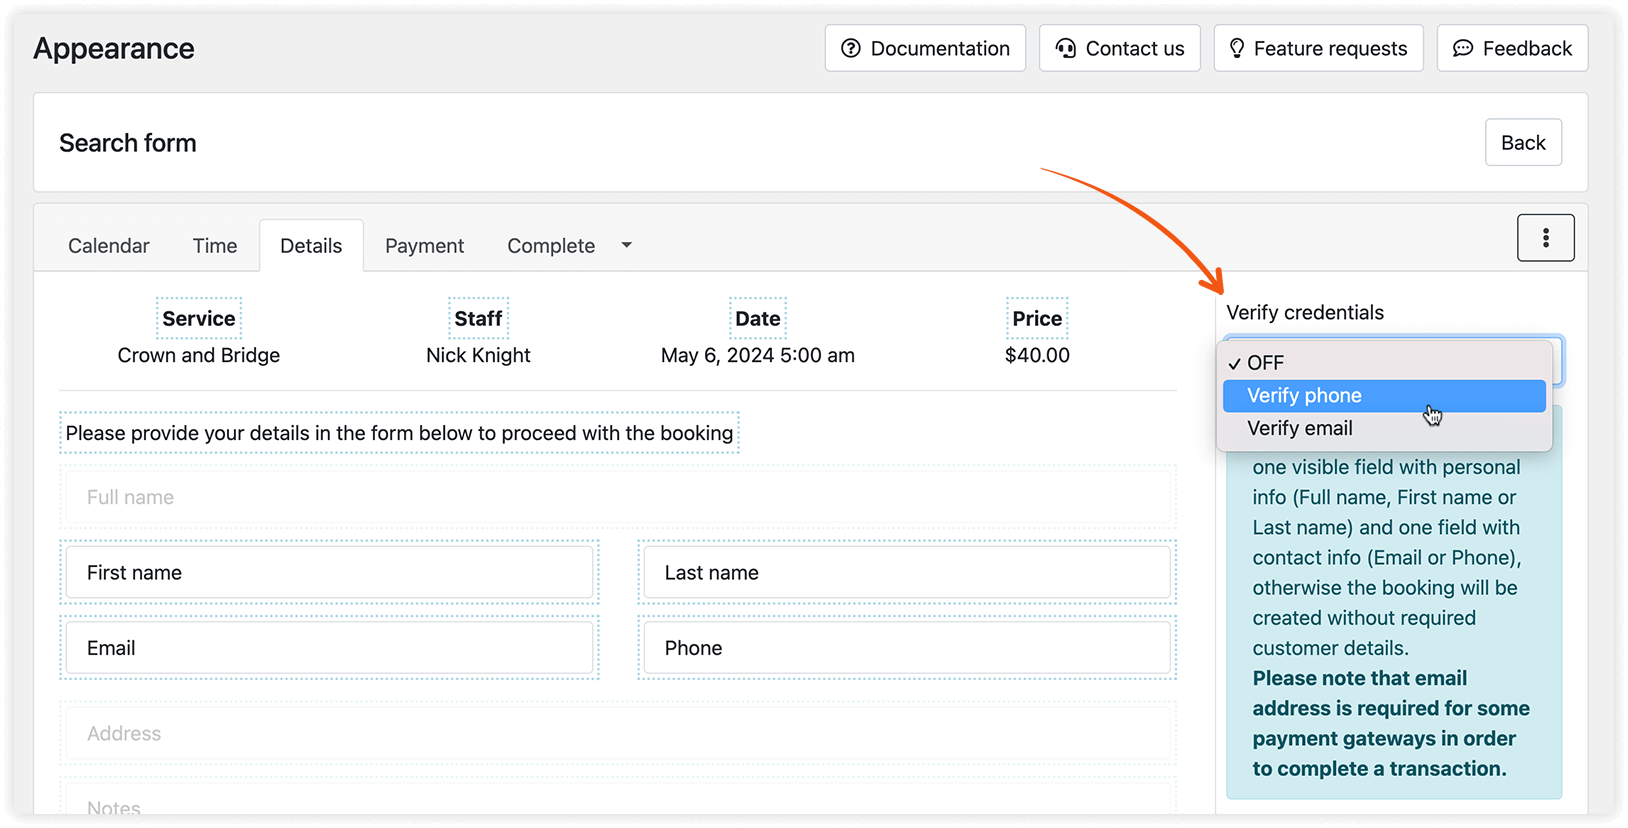
Important: Enable the SMS verification template to send verification codes.
RELATED
Section titled “RELATED”GOOD TO KNOW
Section titled “GOOD TO KNOW”How to configure CRON for Bookly reminders