
View and Manage Appointments
View and manage bookings in Bookly > Calendar or Bookly > Appointments.
On this page:
- View the calendar
- Find appointments
- Create an appointment
- Edit an appointment
- Delete an appointment
- Calendar settings
- Automatic status updates
View appointments in the calendar
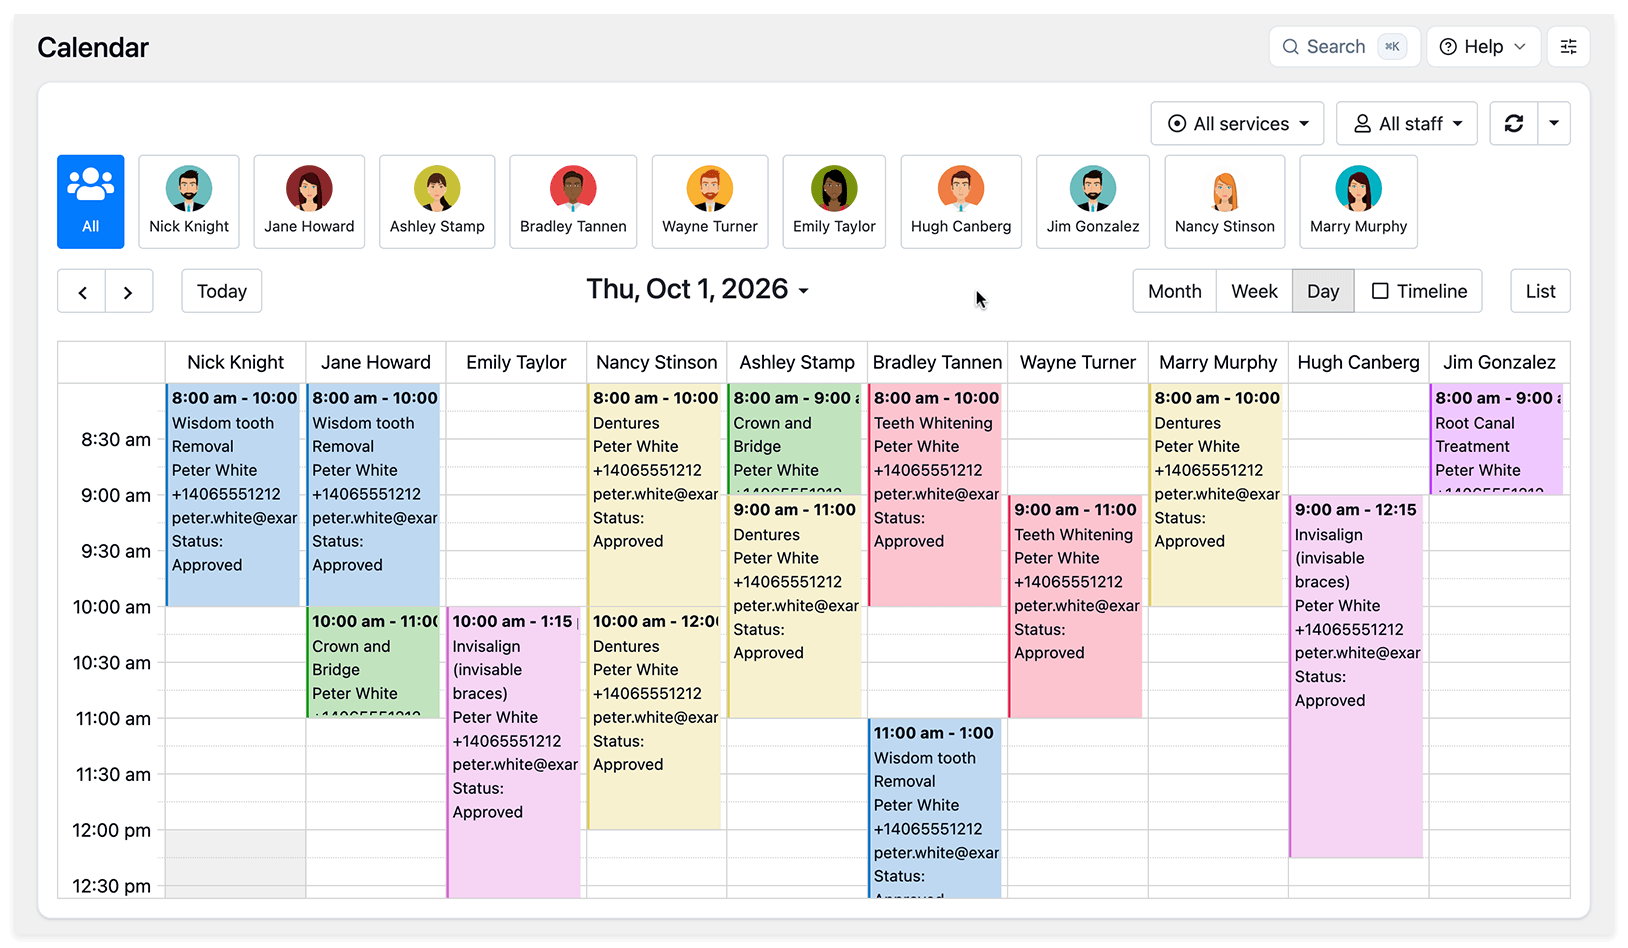
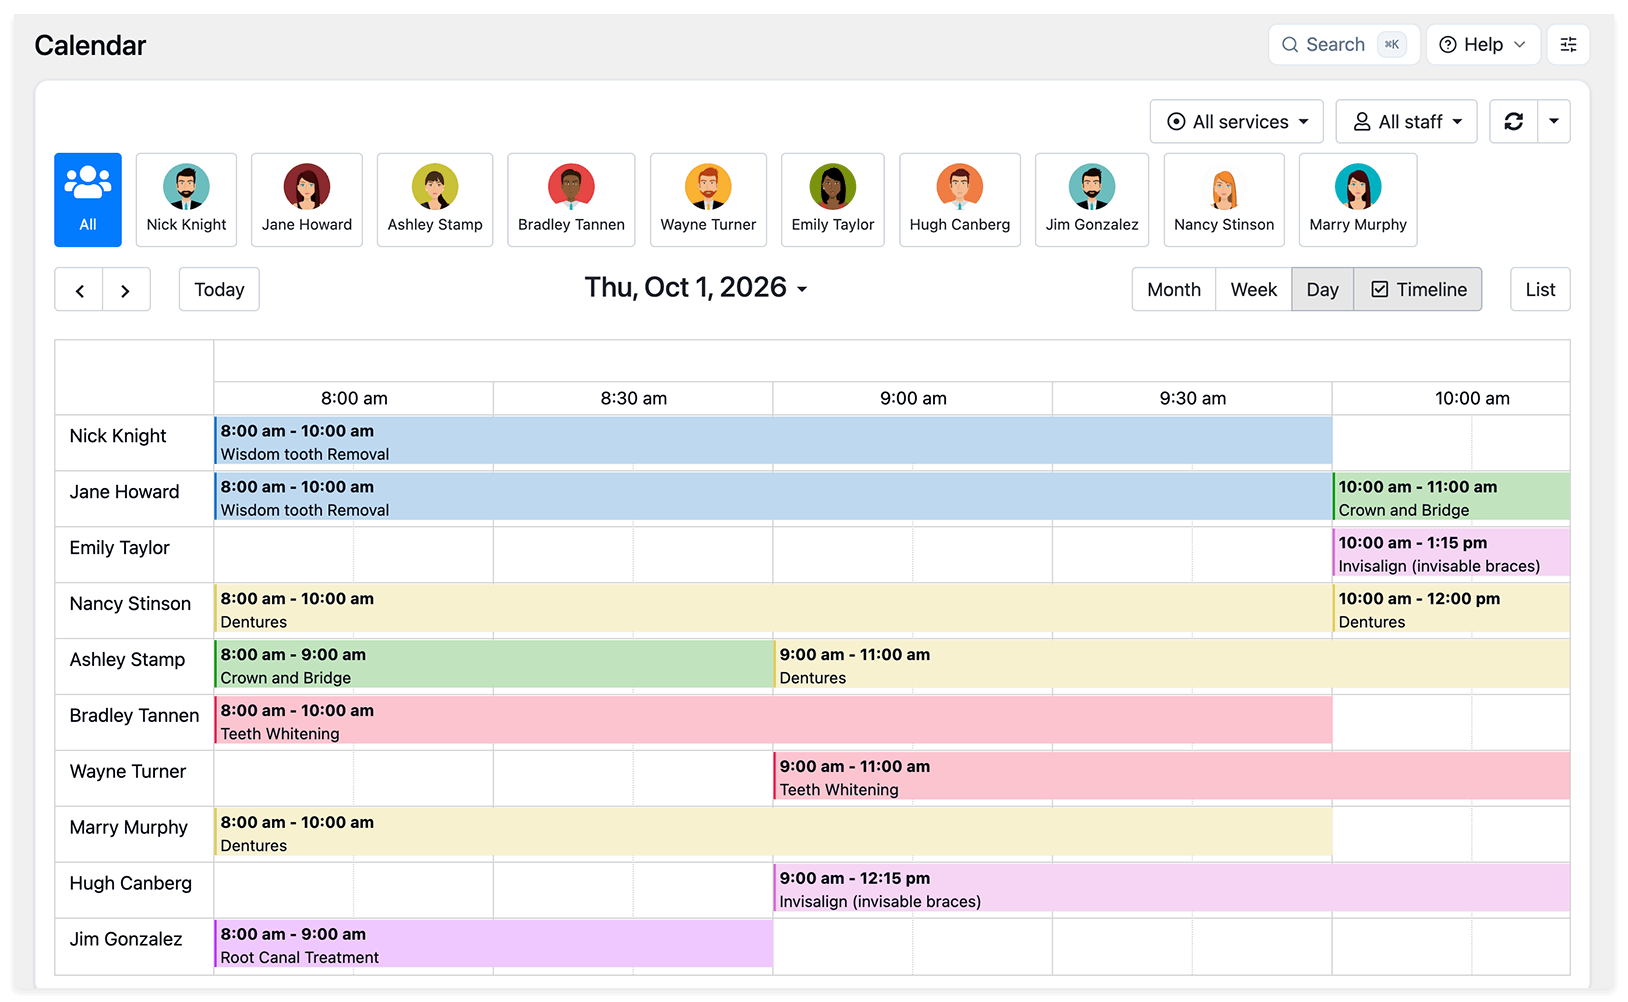
Section titled “View appointments in the calendar”The Calendar initially shows appointments for all staff. Select a staff tab to view one person’s schedule, or use the staff drop-down to combine several schedules. You can also filter by service.
Switch between day, week, month, timeline (horizontal), and list views. Click an appointment to open its details.
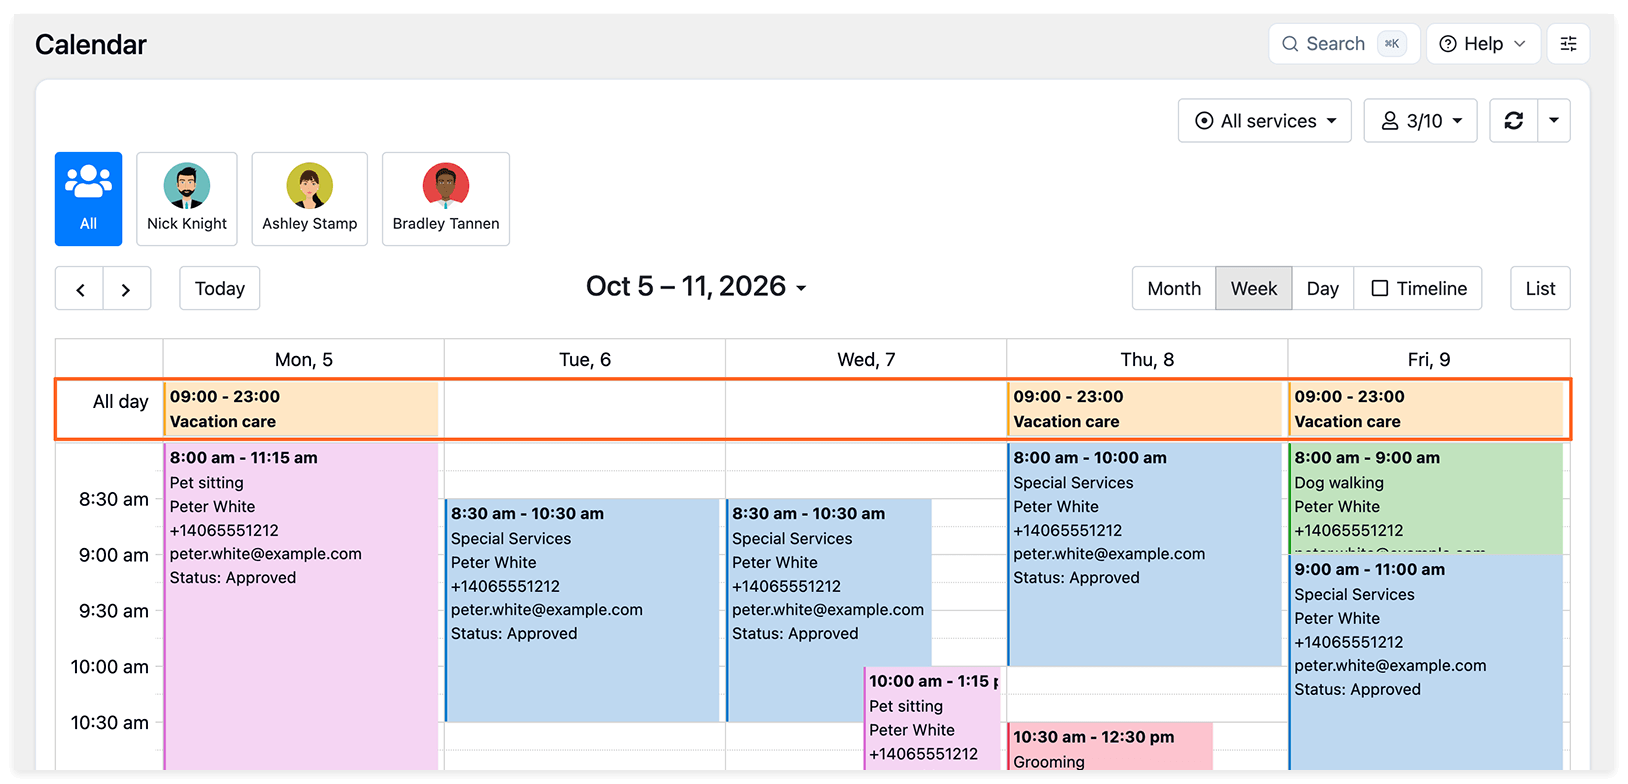
Appointments lasting one day or longer appear at the top of the staff member’s day schedule.
Find appointments in the list
Section titled “Find appointments in the list”The Appointments section lists bookings by appointment number, based on when they were created. Click a column header to change the sorting.
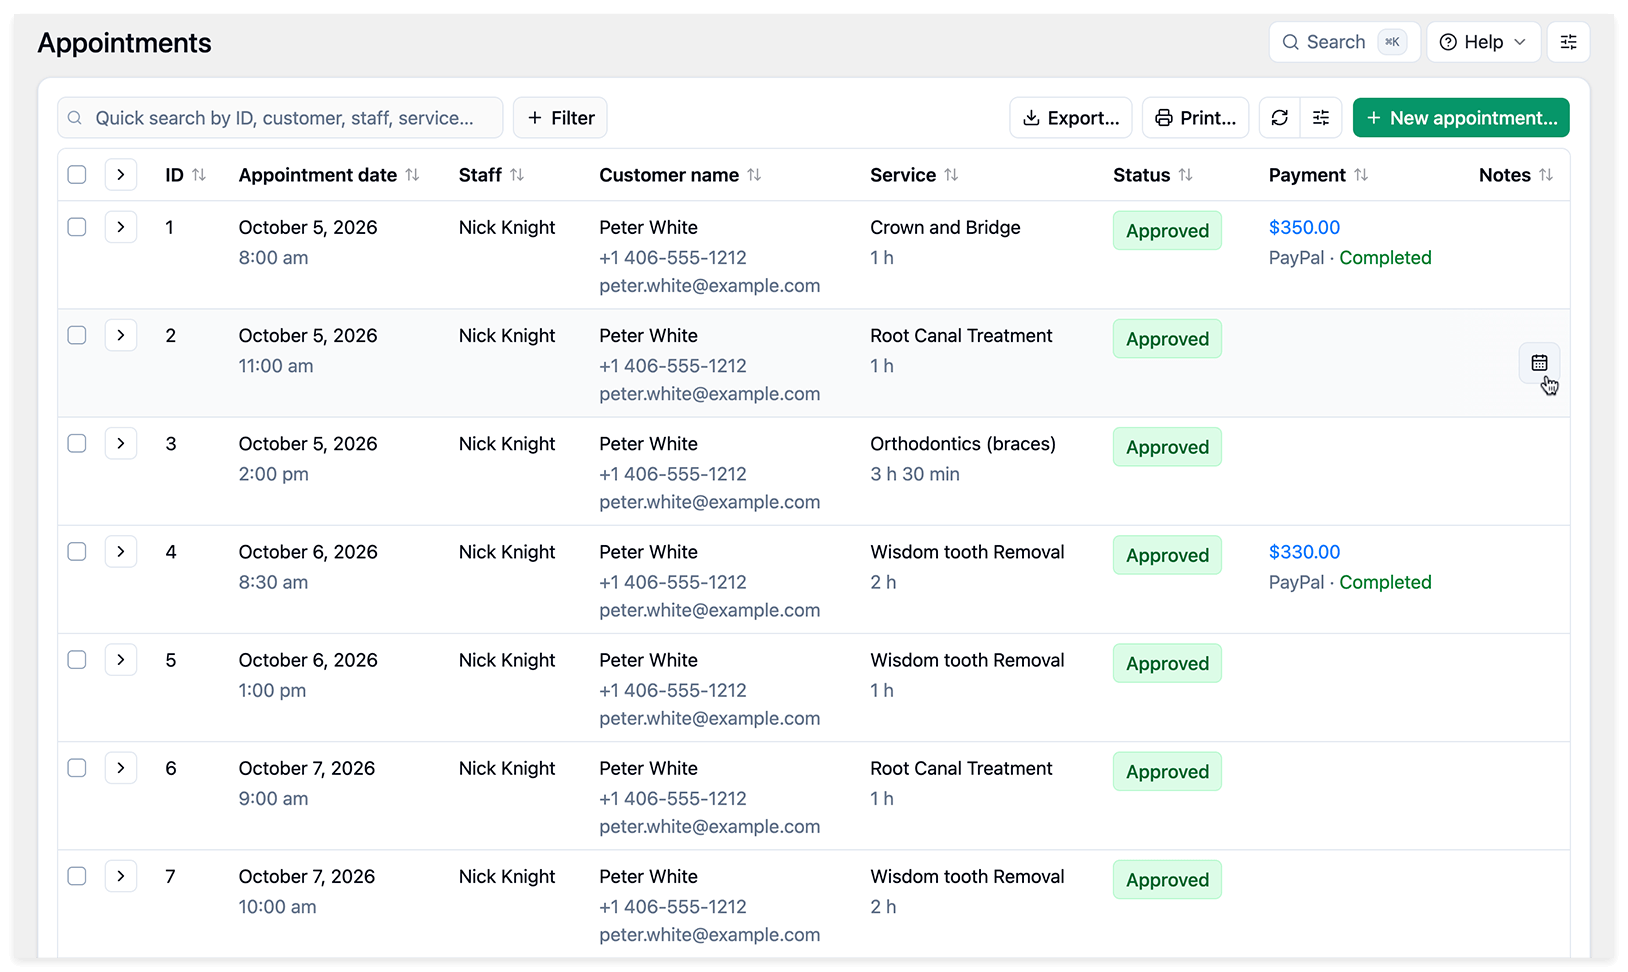
Use the filters to find appointments by staff member, service, customer, status, or date range. You can also search by booking number.
Use the quick search field above the table to find appointments by ID, customer, staff member, or service. To find a customer’s appointments by phone or email, enter their details in the same field.
Columns, export, and printing
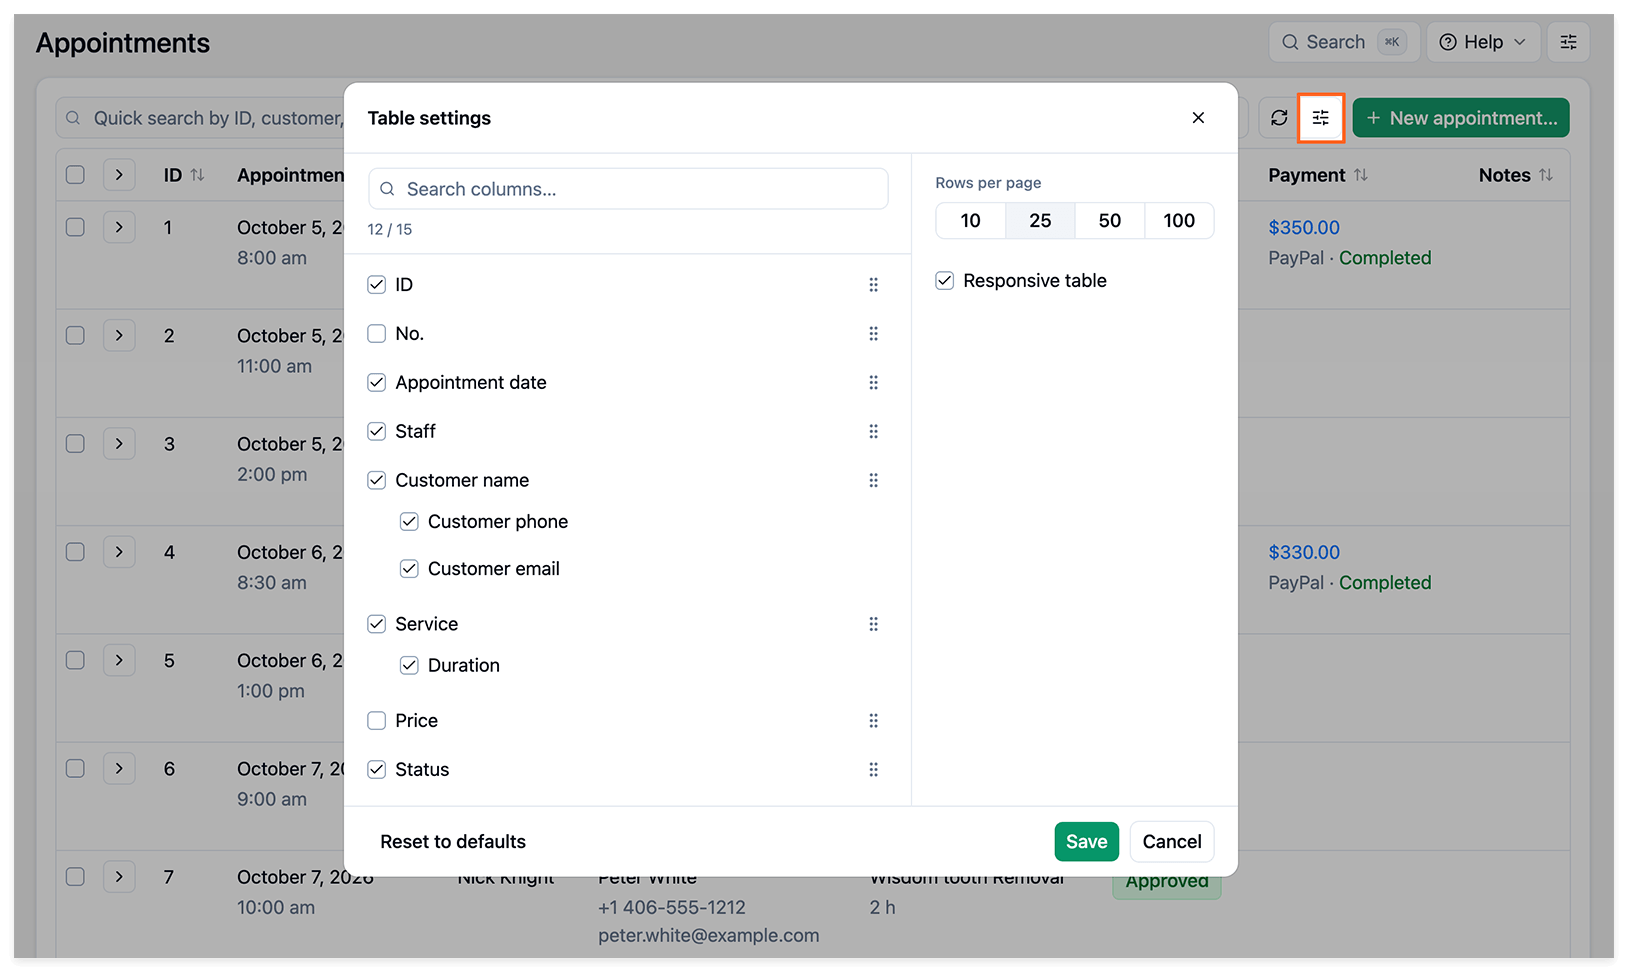
Section titled “Columns, export, and printing”Click the sliders icon next to New appointment to open Table settings. Select the columns to display and drag them to change their order. Click Save to apply your changes, or Reset to defaults to restore the default settings.
Use Export or Print above the table to export the appointment list as a CSV file or print it.
Customer appointment history
Section titled “Customer appointment history”In Appointments, click + Filter, choose Customer, and select the customer’s name. Add another filter to search by appointment date (Date) or by the date the appointment was created.
For Date, select a preset period or choose a date range in the calendar, then click Apply.
Create an appointment
Section titled “Create an appointment”Open a new appointment from either section:
- Calendar: click the desired date and time.
- Appointments: click New appointment in the upper-right corner.
The following options in Settings > Appointments apply only when creating appointments with the classic appointment form. They do not apply when Use the booking wizard is enabled:
- First value for newly created appointments via backend: change the order of the Provider and Service fields.
- Displayed time slots: choose All to allow selection of occupied times, or Only appropriate slots to show available slots, as in the booking form.
- Time delimiter: lets you set a delimiter during a day for appointments created via the backend.
Edit an appointment
Section titled “Edit an appointment”Click an appointment in the Calendar, or click its row in the Appointments list to open it for editing. You can change the staff member, service, date, time, and duration.
Use the Booking Wizard
Section titled “Use the Booking Wizard”Go to Settings > Appointments > Use the booking wizard to choose how appointments are created, viewed, and rescheduled:
- Enabled: opens the booking wizard when you click New appointment, a calendar slot, or an existing appointment.
- Disabled: uses the classic appointment form.
Notify customers and staff
Section titled “Notify customers and staff”To notify customers or staff when creating an appointment or changing appointment details, select the notification checkbox before saving your changes.
Notifications are sent if the corresponding notification templates are configured and enabled. The recipients depend on the selected option and your notification settings.
Internal notes and customer details
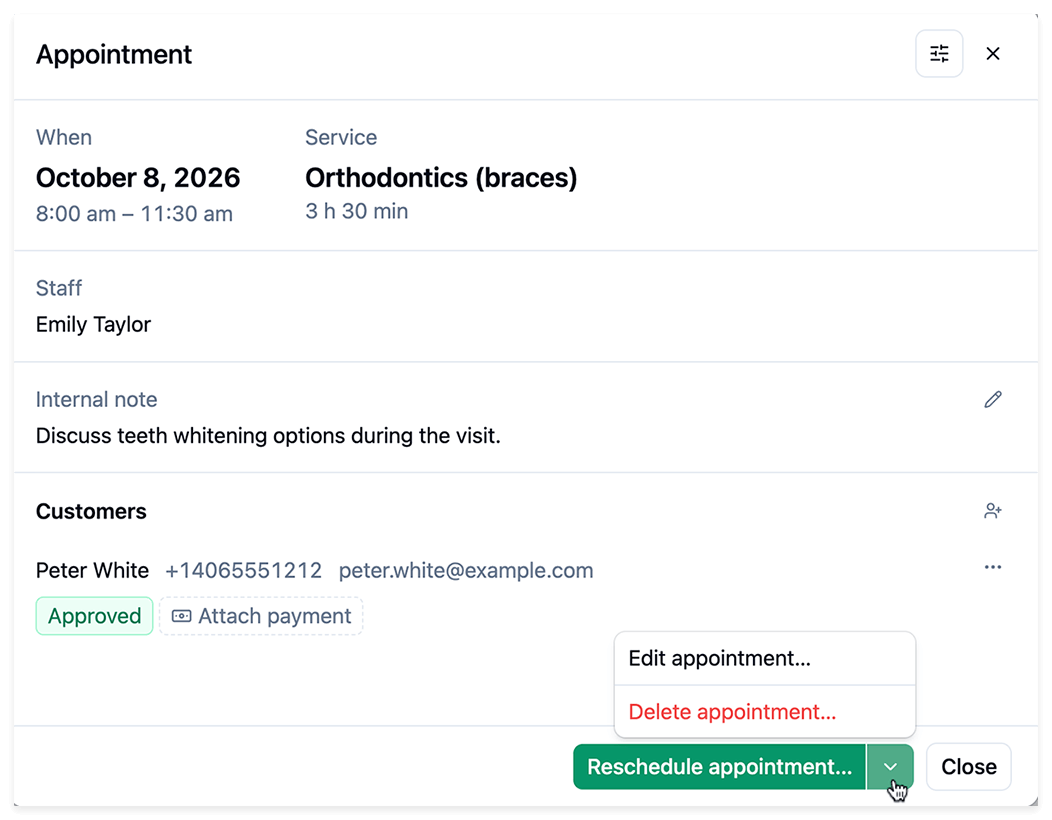
Section titled “Internal notes and customer details”The appointment window looks different depending on the Use the booking wizard setting in Settings > Appointments. Both views let you access internal notes and customer booking details, but the layout and controls differ.
You can add internal notes to an appointment. These are visible to your team only, not to customers.
Customer details include their name, contact information, and appointment status. For group bookings, you can also view how many places each customer booked.
Booking wizard — Appointment preview
Classic appointment form
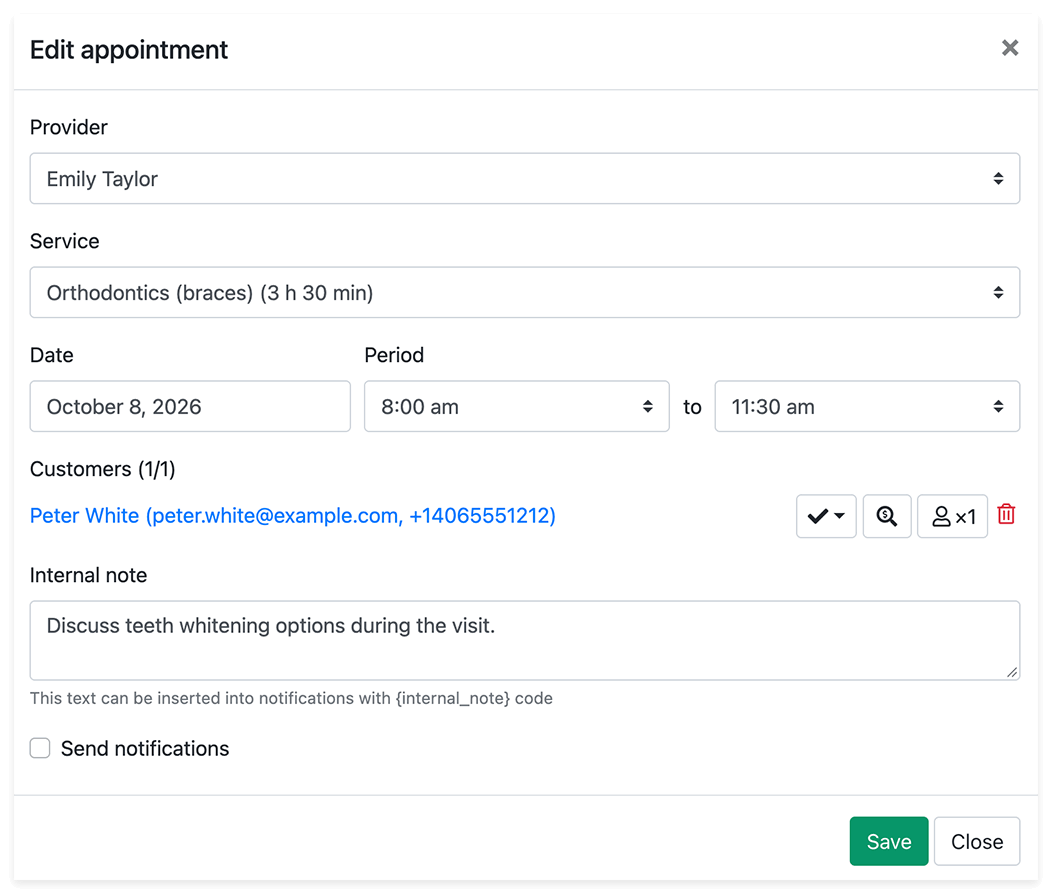
To add or edit Appointment notes, click the customer’s name in the appointment window. In the booking wizard, then click Edit booking details…, enter your notes, and click Apply. In the classic appointment form, clicking the customer’s name opens their booking details directly.
The customer’s booking details include:
- Status: the customer’s appointment status. See Pending Appointments for default status and manual approval settings.
- Timezone: the timezone selected at the Time step, if the booking form’s timezone switcher is enabled.
- Appointment notes: notes entered by the customer at the Details step or added by your team. These are separate from internal notes and can be included in notifications using the
{appointment_notes}code. - Number of persons: places booked with the Group Booking feature.
- Custom Fields: answers to questions added with the Custom Fields feature.
- Extras: items booked with the Service Extras feature.
Delete an appointment
Section titled “Delete an appointment”- Appointments: select the checkbox on the right of the appointment row, then click Delete at the bottom of the page.
- Calendar: click the appointment’s trash icon.
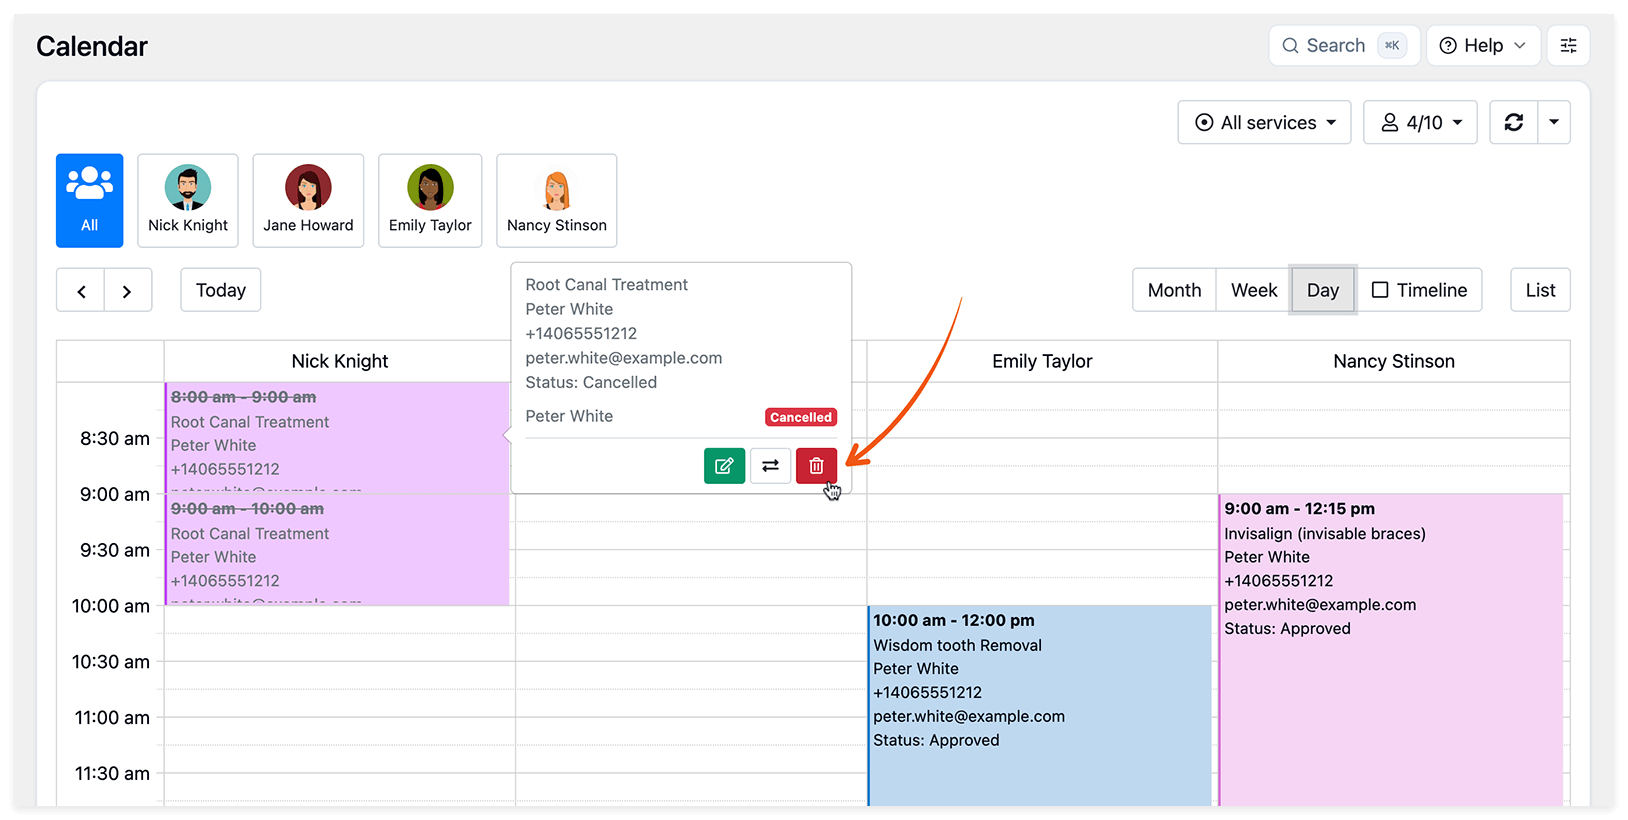
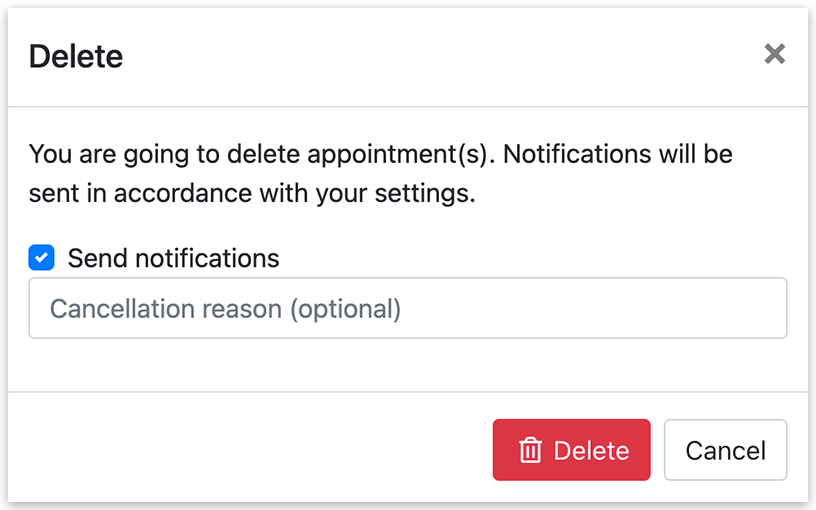
If you choose to send notifications when deleting an appointment, you can enter a cancellation reason. Include {cancellation_reason} in an email notification template to display it in the message.
Calendar settings
Section titled “Calendar settings”Page appearance
Section titled “Page appearance”Click the sliders icon in the upper-right corner of the Calendar to open Page appearance:
- Fixed page width: limits the content width on wide screens.
- Fullscreen mode: hides the WordPress menus.
Month view style
Section titled “Month view style”In Settings > Calendar > Month view style, choose how appointments appear:
- Classic: shows appointment details using your calendar record template.
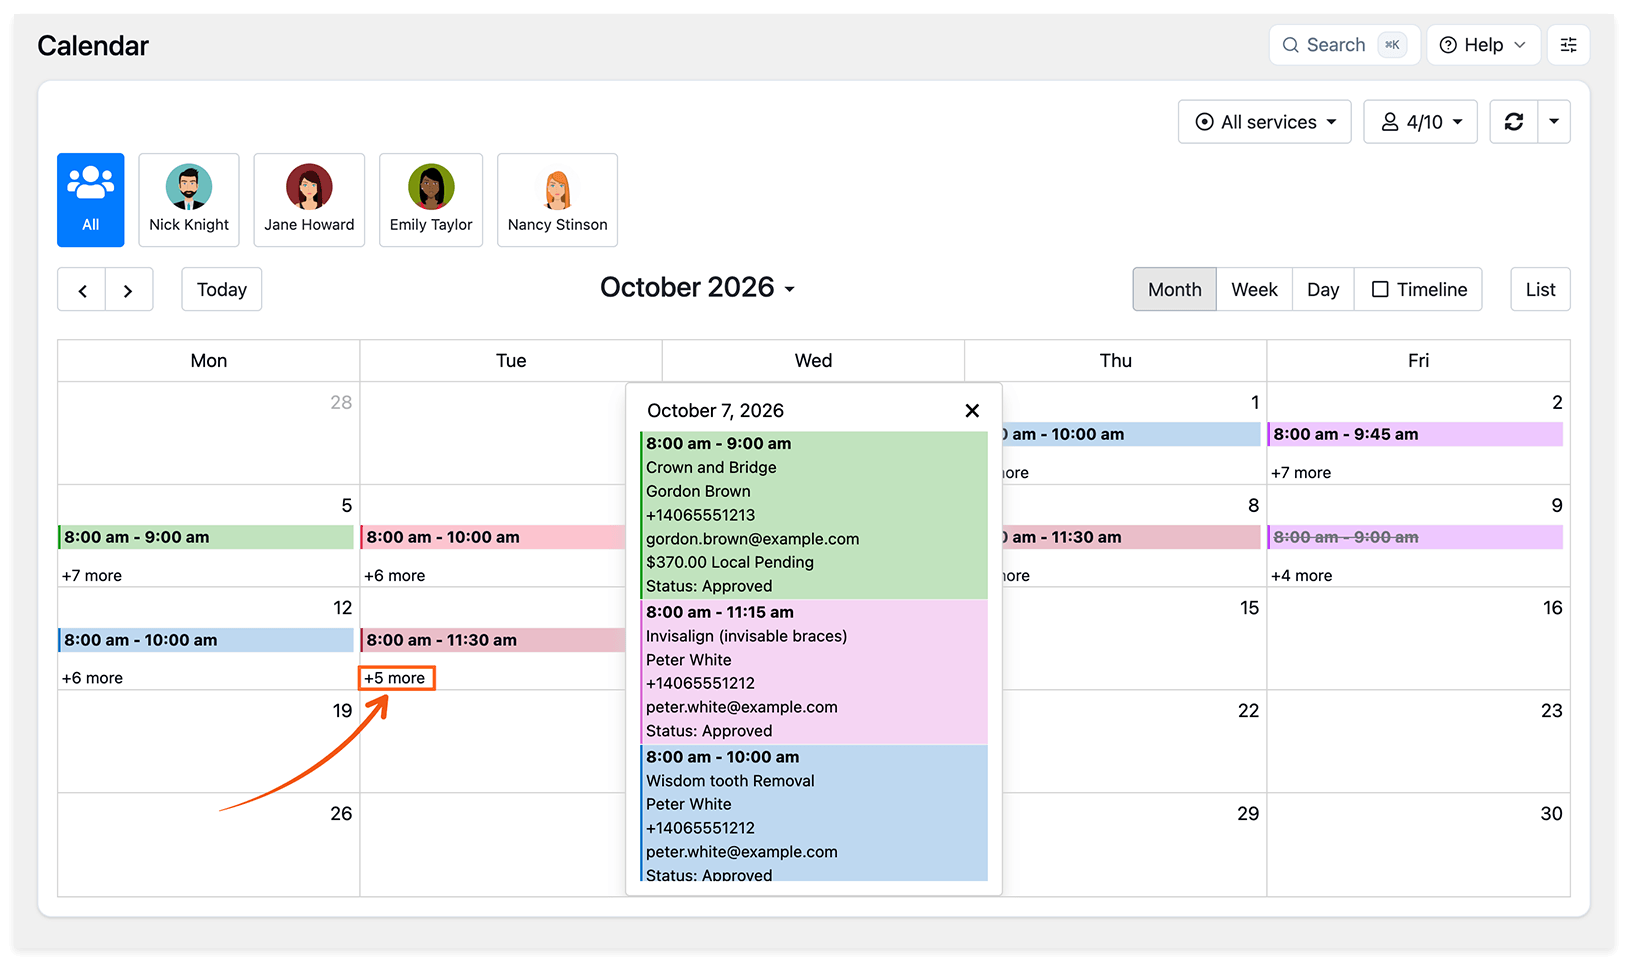
- Minimalistic: shows the appointment count for each day. Click +X more to see that day’s bookings.
Calendar record templates
Section titled “Calendar record templates”In Settings > Calendar, choose the information shown in calendar entries by adding and rearranging codes in the record template. Type { to see available codes.
Use an if block to show text only when a value is available. This example displays the email label and address only if the customer has an email address:
{service_name}{client_name}{client_phone}{#if client_email} CLIENT EMAIL: {client_email}{/if}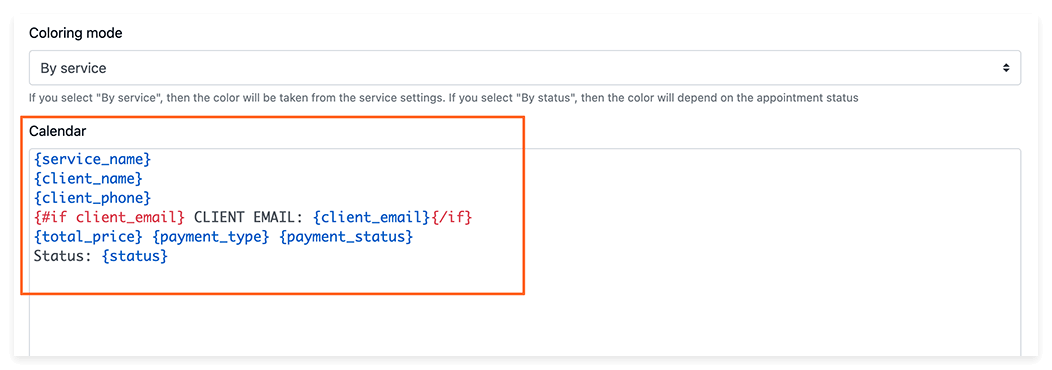
With the Group Booking feature, you can set separate templates for appointments with one participant and with multiple participants. Use an each block to list each customer:
{service_name}Signed up: {signed_up}Capacity: {service_capacity}{#each participants as participant}{participant.client_name}{/each}Appointment colors
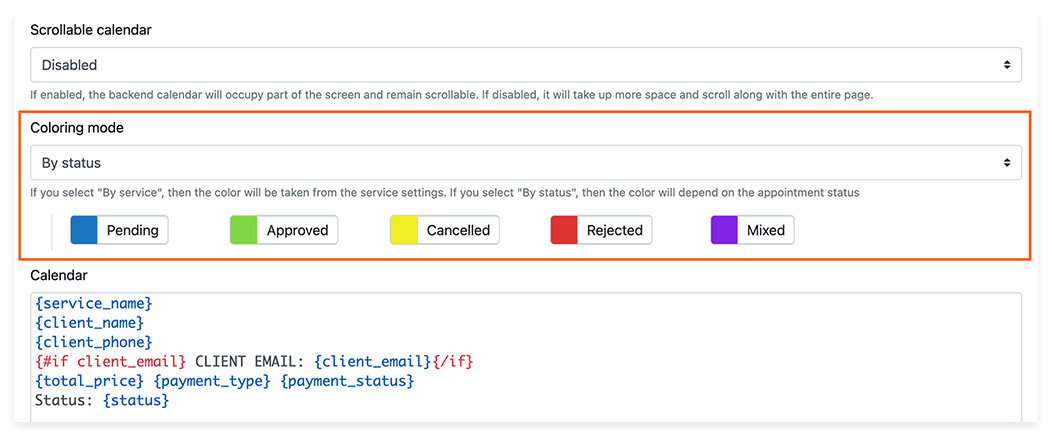
Section titled “Appointment colors”In Settings > Calendar > Coloring mode, choose:
- By service: use the color set in Services.
- By status: color appointments according to their booking status.
- By staff: use the color set in Staff Members.
New appointment counter
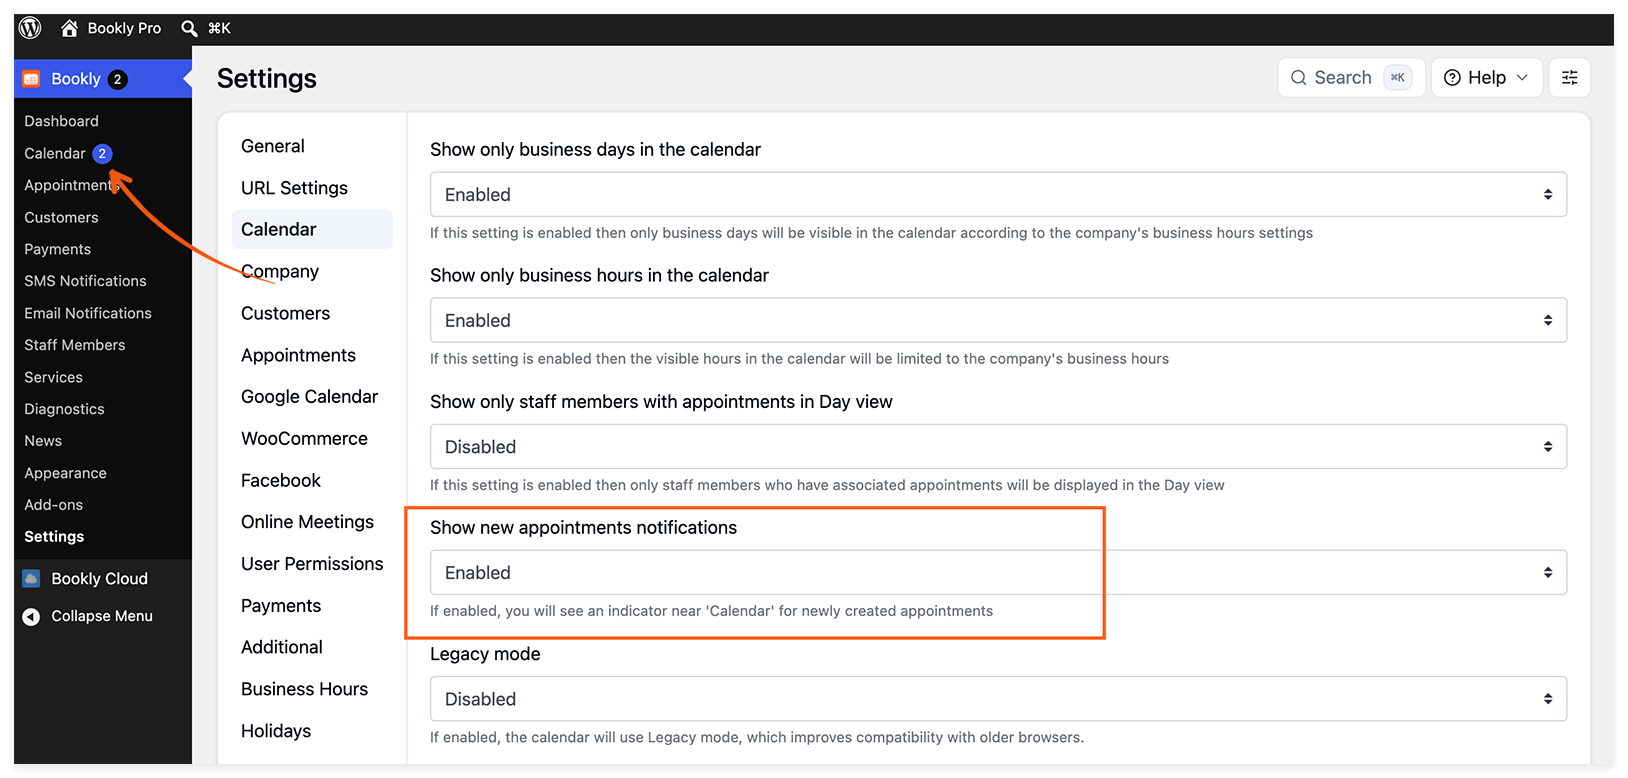
Section titled “New appointment counter”Enable Settings > Calendar > Show new appointments notifications to display a red badge with the number of new bookings. The badge clears when you open Calendar or Appointments.
Automatically update appointment status
Section titled “Automatically update appointment status”To change an appointment’s status after it ends, go to Settings > Appointments > Automatically change the status of the appointment.
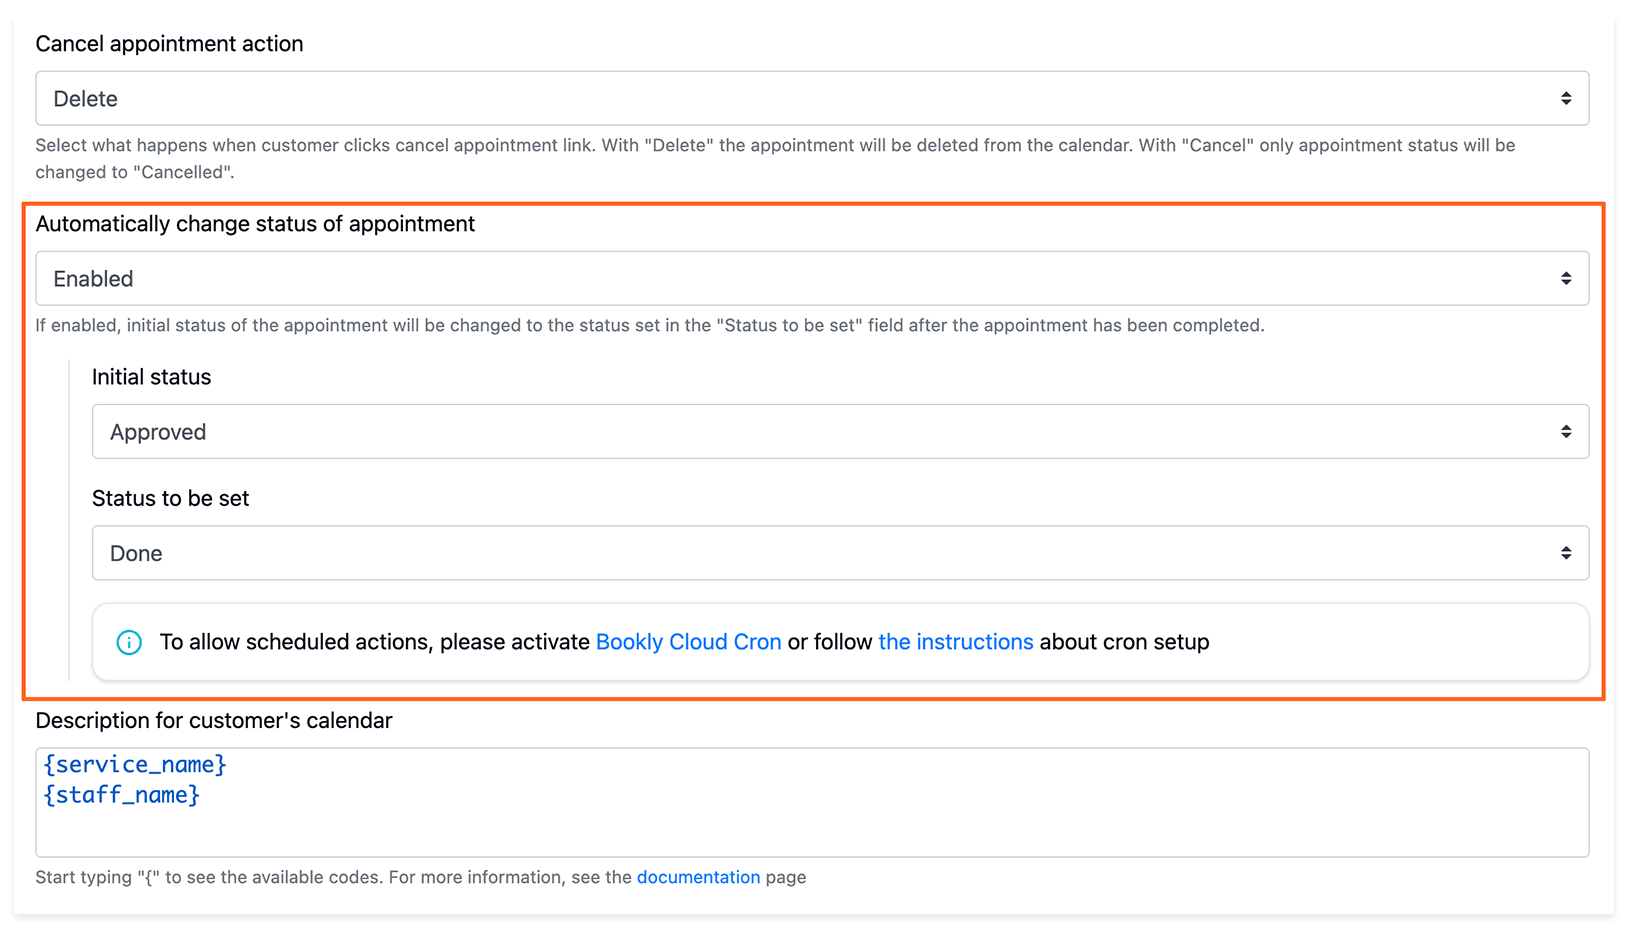
The Custom Statuses feature also lets you use custom statuses.
Related articles
Section titled “Related articles”- Front-end Calendar for Customers — display occupied time slots and service names on your website.
- Pending Appointments — review bookings before confirming them.
- Payments — track customer payments.
- Locations feature — show service locations in appointment management windows.
Video tutorial (older version)
Section titled “Video tutorial (older version)”This video is outdated and may differ from the current version of Bookly.